preferential-lite
shadow

Nonna’s Gnocchi

gnocchi

When made just right, a good bowl of gnocchi will make you weak in the knees. These potato-pasta dumplings are the ultimate in comfort food, and probably the only comfort food I know of that’s actually healthy. Made with just a little flour, potato and egg (optional), gnocchi will give you the energy you need to power through a workout.

I won’t lie – making gnocchi does take work, but the end result is so worth it. This recipe makes 6 servings, a big enough batch for a small crowd.

Ingredients

  • 4-pounds russet potatoes
  • 2 cups all-purpose flour (plus some additional for dusting)
  • 2 egg yolk, beaten (alternatives: 1 tablespoon butter or olive oil)
  • 1 tablespoon olive oil
  • 2 teaspoons salt
  • 4 tablespoons parmesan cheese, grated
  • Dash of pepper or nutmeg (or both)

I recommend using a potato ricer for this recipe. I won’t dare try to make gnocchi without one.

Instructions

  • Preheat oven to 425F.
  • Pierce the potatoes with a fork, and place them on a baking sheet.
  • Bake in the oven for about an hour, or until tender.

Once the potatoes are cool:

  • Cut each potato in half, and remove flesh.
  • Run the potato flesh through the potato ricer.
  • Create a well in the mixture, and pour in the egg yolk, (optional).
  • Sprinkle the mixture with cheese, salt, pepper and a pinch of nutmeg.
  • Add 1 cup of flour and the oil.
  • Gently work the dough using just the tips of your fingers. The flour should be barely incorporated.
  • Add the remaining 1 cup of flour, and work the dough very gently.

To make the gnocchi:

  • Turn out the dough onto a lightly floured work surface.
  • Work the dough very gently for another minute or two. Add a little more flour if the dough is too wet.
  • Cover the dough with plastic wrap, and allow it to sit for 30 minutes.

The dough should feel like dough – not mashed potatoes. Once the mixture stays together, you’re good to go. You don’t want to work the dough too much, or you’ll wind up with gummy, heavy gnocchi.

  • Clean off your work surface, and dust it lightly with flour.
  • Break off one-eighth of the dough, and roll it into a 3/4″ thick rope.
  • Cut the “rope” into 1/2″ pieces.
  • Place the pieces onto a lightly-floured baking sheet.
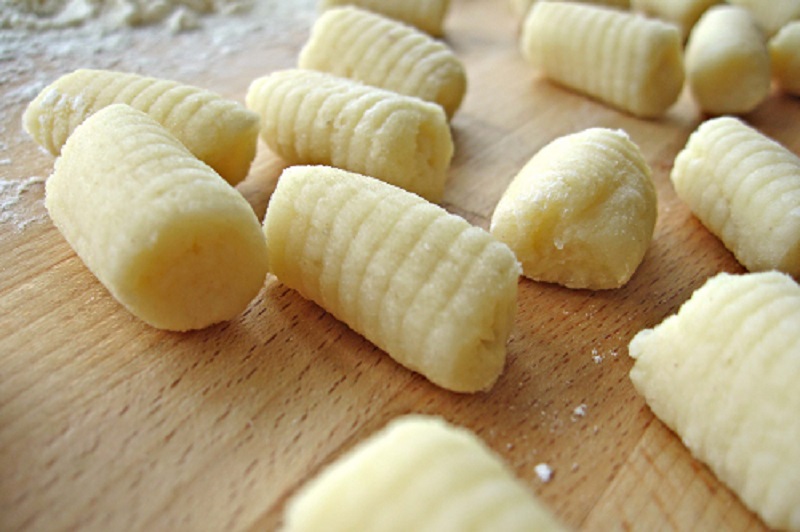
  • Using a small fork, press each gnocchi lightly.
  • Repeat with the remainder of the dough.

To cook the gnocchi:

  • Add salt into a large pot and bring the water to a boil.
  • Add half the gnocchi, and give it a good stir.
  • The gnocchi will float to the top of the water when it’s ready.
  • Remove with a slotted spoon.
  • Repeat with the remaining gnocchi.
  • Toss with your favorite sauce.

The gnocchi can be cooked right away, or you can freeze it for later use. When cooking, you can toss the frozen gnocchi right into the pot.

The Classic Eggplant Parmigiana

eggplant-parmigiana

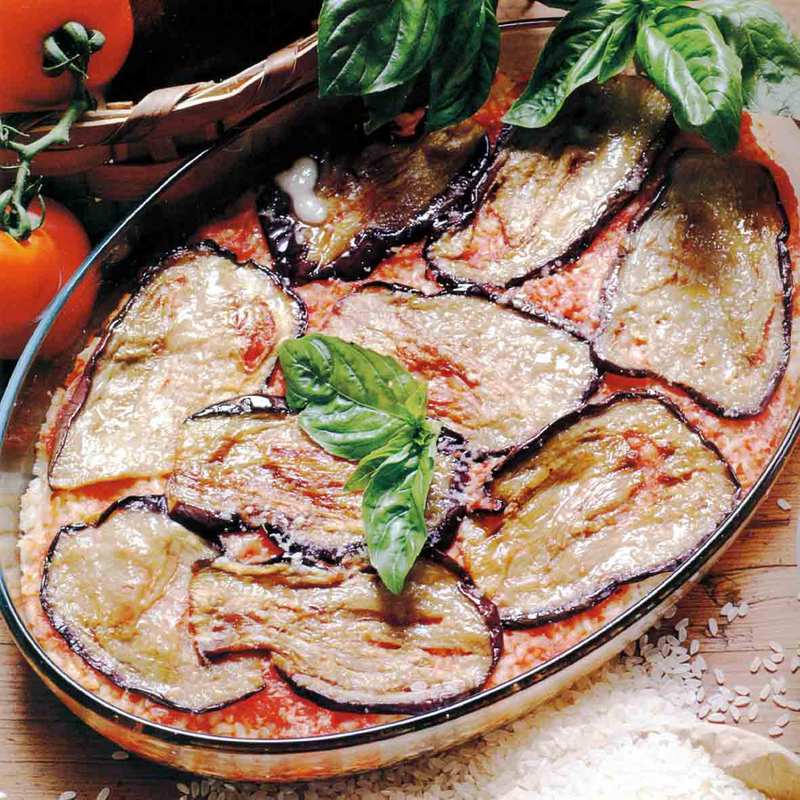
When I first went vegetarian, the dish I missed – craved – the most was chicken parmigiana. The good news? Eggplant parmigiana is just as good. The bad news? Eggplant parmigiana is just as good. Seriously, I probably make this dish way too often.

If you’re not a big fan of eggplant (I wasn’t at first), I encourage you to give this Fine Cooking version a try. The eggplant is peeled and fried, so it’s not spongy or hard to chew. The eggplant slices aren’t breaded either, so it’s gluten-free to boot.

Ingredients

Eggplant

  • 3 cups olive oil
  • 2-1/2 pounds of eggplant (about 2 medium or 4 small)

Sauce

  • 2 garlic cloves, peeled and halved
  • 3-1/2 pounds of plum tomatoes (seeded, peeled and chopped), or 2 x 28oz. cans of San Marzano tomatoes (drained)
  • 3 tablespoons olive oil
  • 12 fresh basil leaves, halved

Assembly

  • 1-1/4 cups of Parmigiano-Reggiano, grated
  • 6 oz. fresh mozzarella, torn into 1/2″ pieces

Instructions

The Eggplant

The first and most important step is to salt the eggplant. The salt draws out all the moisture, making it easier for the eggplant to absorb the oil, and get nice and crispy when fried.

  • First, peel the eggplant.
  • Cut crosswise into 1/4″ thick slices.
  • Cover the top and sides of a colander with eggplant slices, and sprinkle them generously with salt.
  • Add more layers of eggplant, and add more salt.
  • Repeat this process until you run out of slices.
  • Let the colander sit for 30 minutes – 2 hours.

The Sauce

While you’re waiting for the eggplant, make the sauce.

  • Heat the 3 tablespoons of olive oil in a skillet on medium heat.
  • Add the garlic, and allow it to cook until fragrant (about 1-2 minutes).
  • Add the 1/2 teaspoon of salt and tomatoes.
  • Turn up the heat to medium, and allow to cook for 25 minutes, stirring occasionally, or until the tomatoes break down.
  • Add warm water one tablespoon at a time if the sauce starts to dry up.
  • Lower heat to medium, and cook 5-10 minutes more.
  • Remove from heat.
  • Add the basil leaves.

The sauce should be thick and chunky. Too much liquid in the sauce will make the dish watery.

Frying the Eggplant

  • Dry all eggplant slices with paper towels.
  • Heat the 3 cups of olive oil in a saucepan until it reaches 375F.
  • Add as many eggplant slices as will fit in a single layer.
  • Cook 2 minutes on the first side, and one minute on the other.
  • Transfer slices to a paper-towel lined plate.
  • Repeat until all eggplant slices are fried.

Assembling and Baking

  • Preheat the oven to 450F.
  • Place one layer of eggplant slices in the bottom of a baking dish.
  • Add a generous layer of tomato sauce.
  • Add a layer of mozzarella (about half).
  • Add another layer of eggplant.
  • Add one last layer of sauce.
  • Add one last layer of cheese.
  • Bake in the oven for 20-25 minutes

Allow the dish to rest at least 15 minutes before serving.

The Best Cauliflower Pizza

cauliflower-pizza-crust

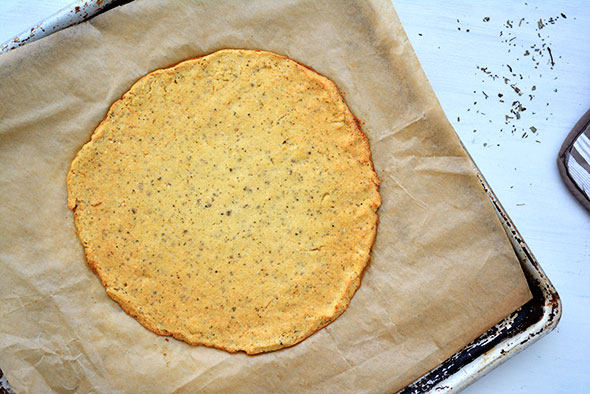
Of all the superfoods on the planet, cauliflower is all the rage right now. We’re using this low-carb veggie to make everything from “breadsticks” to “rice” and yes, even pizza crust. With a neutral taste and satisfying texture, this vegetable makes a great replacement for all those high-carb, fattening foods we’re trying to stay away from.

I never did have much luck with the pizza crust until I found this recipe from the Food Network’s Katie Lee. Here’s how to make this paleo-, vegan-friendly pizza:

Ingredients

  • 1 cauliflower head
  • 2 eggs, beaten
  • 1/2 cup mozzarella cheese, shredded
  • 1/4 cup Parmesan cheese, grated
  • 1/2 tsp. salt
  • 1/2 tsp. oregano, dried
  • 1/4 tsp. garlic powder

Makes 1 pizza crust

Directions

  1. Preheat your oven to 400F.
  2. Line a round baking sheet with parchment paper.
  3. Remove the stalk from the cauliflower, and carefully break it into florets.
  4. Place the florets into a food processor, and process until finely chopped.
  5. Steam the cauliflower in a steamer basket.
  6. Drain well, removing as much moisture as possible.
  7. Let the cauliflower cool.
  8. Mix the Parmesan cheese, mozzarella cheese, salt, oregano, eggs and garlic powder in a large mixing bowl until well combined. At this point, it should look a little more like dough.
  9. Transfer the mixture to the center of your parchment-lined baking pan.
  10. Spread the crust mixture out to form a circle.
  11. Bake for 20 minutes.
  12. Add your favorite toppings.
  13. Bake another 10 minutes.

Helpful Tips

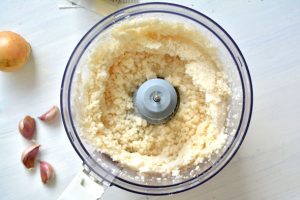
If you don’t have a food processor, you can finely chop the florets by hand, or break them down into smaller pieces by hand. This can be pretty time consuming, so I highly recommend using a food processor for this recipe.

cauliflower-food-processor

When draining the cauliflower, I try to remove as much moisture as possible. A towel can help soak up any leftover moisture.

Make sure your cauliflower is very finely chopped, so it mixes well with the other ingredients. Large lumps can throw off the texture of the crust and keep it from getting nice and crispy in the oven.

You can use any toppings you want with this crust, but I do recommend taking it easy with layering toppings. A supreme pizza, for example, may not be the best choice for this crust. Remember, it’s not quite as springy or flexible as a gluten crust.

This is the best cauliflower pizza I’ve ever tried, and the only one that stayed together. Enjoy!

Butternut Squash Risotto: Fall in a Bowl

butternut-squash-risotto

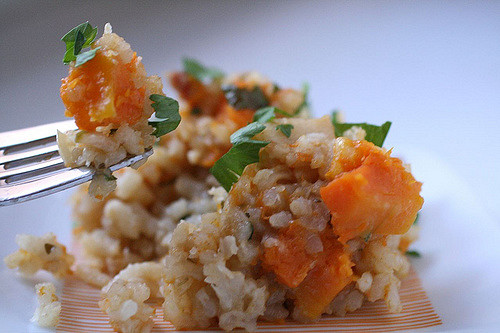
Butternut squash risotto is a classic fall dish, and it’s one that will please even the pickiest of guests (I’m talking to you, meat-eaters). Comforting, creamy and oh-so-satisfying, you may find yourself making this risotto every chance you get.

Ingredients

  • 1 butternut squash, peeled and chopped into 1” chunks
  • 1-1/2 cups Arborio rice (spring for the good, imported kind)
  • 1 onion, diced
  • 3 tbsp. olive oil
  • 4 tbsp. butter
  • 5 cups vegetable stock
  • 1 cup dry white wine
  • 1/4-cup parmesan cheese, grated
  • A dash of freshly-grated nutmeg
  • Vanilla extract
  • Salt and pepper to taste

Instructions

  • Heat the butter and oil in a saucepan over medium heat.
  • Add the onion, and cook until softened.
  • Add the butternut squash, and stir until coated with the oil/butter mix.
  • Add a drop or two of vanilla extract. Be careful not to overdo it.
  • Add some freshly-grated nutmeg.
  • Add 1/2 cup vegetable stock and 1/2 cup of the wine.
  • Cover, and allow the mixture to simmer for about 20 minutes, or until the squash is tender (don’t allow the squash to turn to mush).

Meanwhile:

  • Heat the remaining four cups of vegetable stock in a separate saucepan over medium heat, and keep it at a simmer.

Once the squash is tender:

  • Heat 1 tbsp. butter and 2 tbsp. olive oil in a large saucepan over medium heat.
  • Add the rice, and stir constantly for about 5 minutes, or until the rice squeaks.
  • Add the remaining white wine, and stir until the pan is nearly dry.
  • Pour in one cup of the heated vegetable stock, and stir until fully absorbed.
  • Add the squash mixture.
  • Stir for one minute, and add another 3/4-cup of stock.
  • Stir for 30 seconds.
  • Keep stirring to keep the rice from sticking.
  • Once absorbed, add another 3/4-cup of stock.
  • Repeat these steps until the rice is al dente, but cooked in the center.
  • Season with salt and pepper.
  • Add the remaining two tablespoons of butter and parmesan cheese.
  • Stir, and serve immediately.

Feel free to top your plate with some extra black pepper, freshly-grated nutmeg or parmesan cheese (or all three – we won’t judge).

One thing I do have to note here: please, please make sure that you use a good imported Arborio rice. Otherwise, you’ll be quite disappointed with the results.

Also, the recipe says to “continue stirring,” but like with any other risotto recipe, you don’t want to stir the entire time. Constant stirring will give your risotto a texture that’s more like mashed potatoes than anything else.

How to Stay Motivated to Exercise

fitness-quote

The key to maintaining your fitness is simple: stay motivated. Exercise is the only way to achieve optimal fitness, and if you don’t consistently exercise, you’ll quickly find that you’ll remain stagnant when trying to achieve your goals.

Without consistency and motivation, you won’t be able to reach optimal fitness.

And this is why so many people start the year with the goal of getting fit, and the majority will quit within the first three months.

There are no shortcuts.

You need to stay motivated, or all your efforts will be wasted. A few ways to stay motivated are:

1.    Set Goals for Yourself

Goals are essential. You need a purpose for staying dedicated to your exercise routine. The catch is that you need to be able to achieve simple goals, and not set goals that are impossible to achieve.

So, you’ll want to:

  • Create short-term goals to keep you motivated
  • Add long-term goals over time as you remain more consistent

An example of a short-term goal may be to use a rowing machine for 10 minutes a day (these are great for full body workout – shoutout to HomeGymSumo.com for some great advice), four times per week.

You’ll then want to create intermediate and long-term goals, which can be:

  • Intermediate – use the rowing machine for 30 minutes, five times per week
  • Longterm – row for 60 minutes, five times per week

2.    Track Your Results

It’s very easy to get discouraged when starting an exercise routine, and this is something that happens to everyone. You need to overcome this discouragement by tracking your progress. When you track your progress, you’ll:

  • See your results on paper
  • Have a way to analyze and adapt a routine

There are a lot of ways to track your results, including:

  • Fitocracy
  • Myfitnesspal

And you’ll find dozens of apps that will allow you to track your results, too.

3.    Switch It Up and Make It Fun

If you make exercise a grueling experience, you’ll never succeed. People have a tendency of hating and abandoning anything that isn’t fun. Everyone hates going to the gym the first month or two, but if it’s grueling, you’ll never be consistent.

You need to make it fun.

This is done by switching up your routine, or at least adding fun exercises into your routine. This can be anything, such as:

  • Joining a running group
  • Joining a martial arts class
  • Going to free exercise classes
  • Participating in a sport you like

If you like swimming, you can substitute a day at the gym or on the rowing machine for a good long swim that will engage different muscles and help build cardiovascular health.

The goal is to stay motivated, and it’s far easier to stay motivated when you’re doing something you like – not something you despise.

4. Stop Making Excuses (You are Only Lying to Yourself)

At some point, everyone thinks before they head to the gym: ‘I’m tired I’ll go to the gym tomorrow‘. Some do it more than others, but in the end you are just lying to yourself, so it’s important to recognize this and just go anyway.

Even if  your workout isn’t that great it’s so much better than doing nothing at all, and afterwards you will feel glad that you did, the feel-good hormones after exercise always help.

To make things easier, if you aren’t a fan of going to a gym full of other people, invest in some fitness equipment that you can use at home.

The cross trainer (or elliptical trainer) is a great machine for beginners (check out these cross trainer reviews if you aren’t familiar with them), and this should go a long way to helping you keep motivated.


Spinach and Eggplant Lasagna Roll-Ups

eggplant-and-spinach-roll

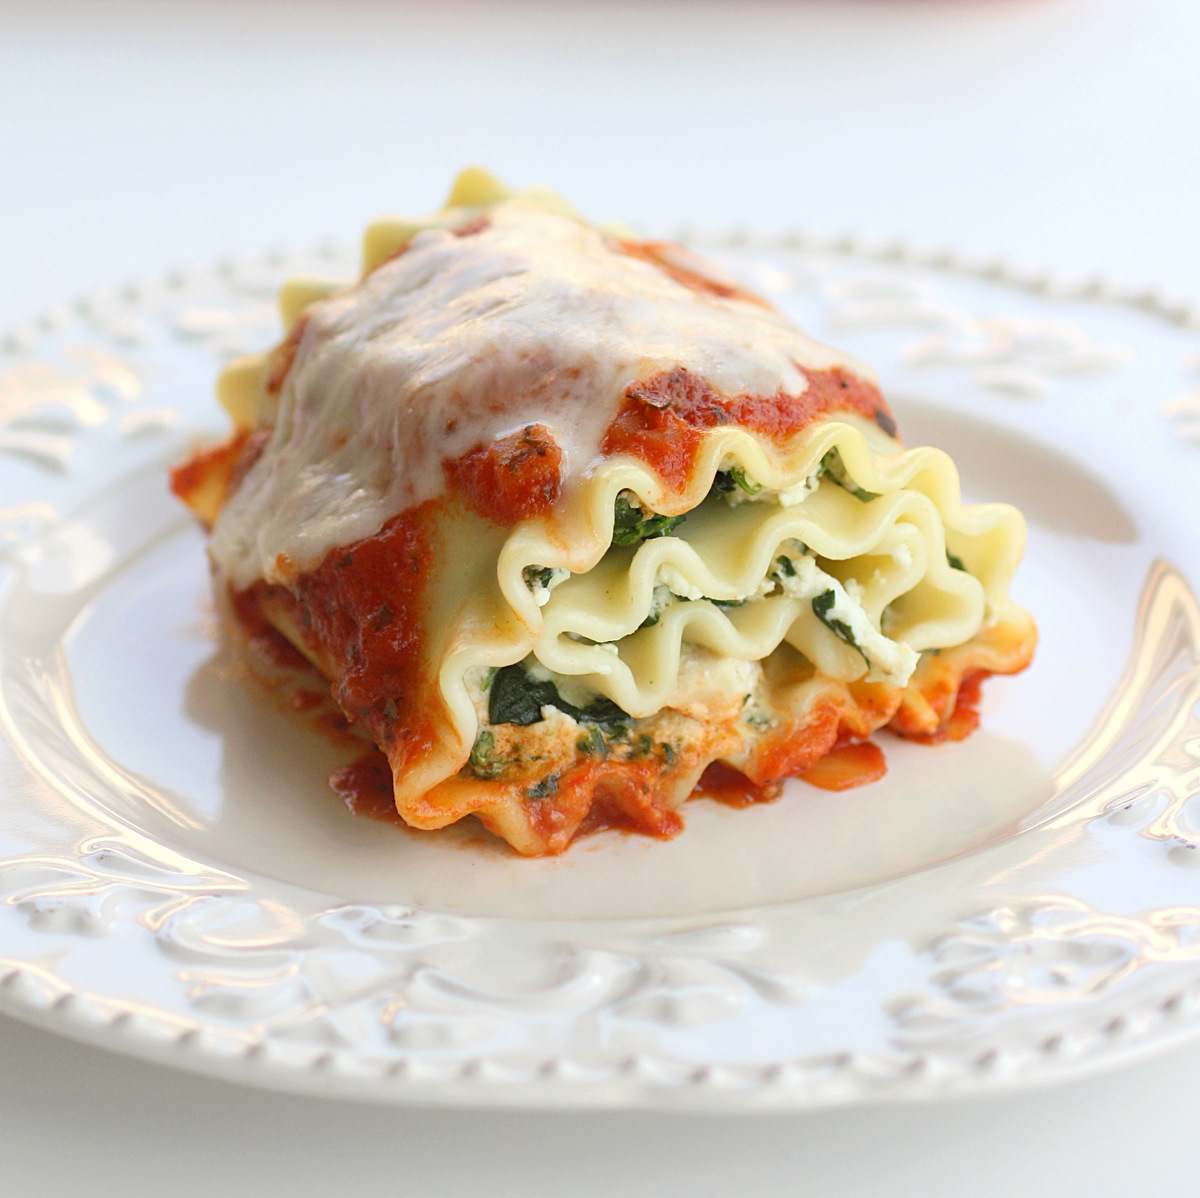
Who doesn’t love a good lasagna? This hearty dish is a favorite in our household, but it’s not something we can eat all the time (at least that’s what my doctor told me). These eggplant and spinach lasagna roll-ups are just as good as its classic Italian cousin, but aren’t as hard on your waistline.

Ingredients

Tomato Sauce

  • 5 tbsp. olive oil
  • 3-pounds plum tomatoes, halved
  • 1/2 tsp. black pepper
  • 3/4 tsp. salt
  • 1 onion, chopped
  • 2 garlic cloves, minced
  • 1/2 cup water
  • 1/4 cup basil, chopped

Lasagna Roll-Ups

  • 3 tbsp. olive oil
  • 2-pounds eggplants, halved crosswise and cut into slices less than 1/4″
  • 1 garlic clove, chopped finely
  • 1-1/4 tsp. salt
  • 1/2 tsp. freshly ground black pepper
  • 10 oz. baby spinach
  • 1 large egg yolk, beaten
  • 1-pound ricotta cheese
  • 8-ounces lasagna noodles (not the no-boil kind)

Instructions

Making the Sauce

Start by preheating the oven to 450F.

  • Mix tomatoes with the 3 tablespoons of olive oil, 1/4 teaspoon of pepper and 1/2 teaspoon of salt.
  • Arrange tomatoes cut-side up in a single layer in a shallow baking dish. You may need two or more dishes.
  • Roast tomatoes on the upper and lower racks, switching positions halfway through, about 35-40 minutes. The skins should be wrinkled and browned slightly.
  • Remove from oven, and allow the tomatoes to cool slightly on racks.

Once the tomatoes are cool enough to work with, remove and discard the skins. Puree the tomatoes in a food processor with its juices until smooth. Now you can finish making the sauce:

  • Cook garlic and onions in 2 tbsp. oil in a 4-quart saucepan over medium heat for about 10 minutes.
  • Stir in water, tomato puree, pepper and salt.
  • Bring to a simmer, and cover partially.
  • Cook for 15 minutes, stirring occasionally, until thickened slightly. Reduce to about 4 cups.
  • Add the basil.

Roasting the Eggplant

  • Mix the eggplant with the garlic clove, oil, 1/2 tsp. salt and 1/4 tsp. pepper.
  • Arrange the eggplant in a single layer on baking sheets.
  • Bake for 12-14 minutes on the upper and lower racks, switching positions halfway through and turning the slices over.

Lower the oven temperature to 350F.

Assembling and Baking the Roll-Ups

While the sauce is cooking and the eggplant is cooling:

  • Cook the spinach in a 4-quart pot of salted boiling water for one minute.
  • Drain the spinach in a colander, and allow it to cool.
  • Once cool enough to handle, squeeze out excess water.
  • Chop coarsely.
  • Mix egg yolk, ricotta, salt, Parmesan cheese and pepper until well combined.

Meanwhile:

  • Cook the lasagna noodles in an 8-quart pot of boiling water (add salt to stop the noddles from sticking). Stir occasionally.
  • Drain the noodles in a colander.
  • Rinse under cold water.

To assemble:

  • Spoon 2 cups of the tomato sauce into a baking dish.
  • Arrange four lasagna noodles on your work surface, and spread filling evenly over each one.
  • Cover the ricotta mixture with one eggplant slice.
  • Roll up the noodle.
  • Place the roll-up seam-side down into the baking dish.
  • Repeat for the remaining noodles.
  • Gently brush the noodles with water.
  • Spoon sauce down the middle of the roll-ups.
  • Cover tightly with foil.
  • Bake on the middle rack until fully heated, or about 20 minutes.

Heat up the leftover tomato sauce to serve with the roll-ups.